If you’ve got a stack of Virtual PC images clogging up your hard drive(and who doesn’t these days?), here’s how to compress (or compact) them.
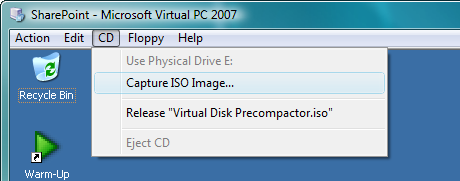
1. With the Virtual PC image running, choose Capture ISO Image… from the CD Menu
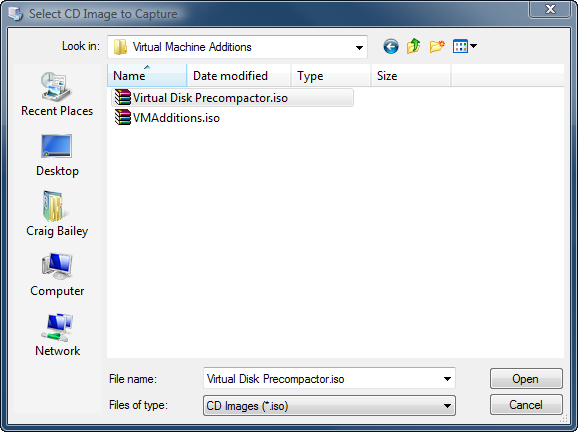
2. When the dialog opens, find the Virtual Disk Precompactor.iso image (it’ll be in your C:\Program Files\Microsoft Virtual PC\Virtual Machine Additions\ directory)
3. When loaded the program will run automatically and prompt you as follows:
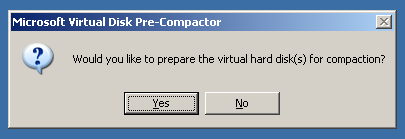
4. Click Yes and the PRe-Compactor starts it’s magic.
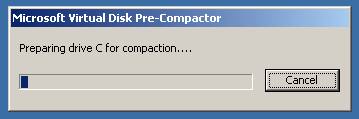
5. Once complete it’ll tell you to go look in the Help file. Cheers, thanks for that!

6. Now close down the Virtual PC (ie shutdown the operating system and everything)
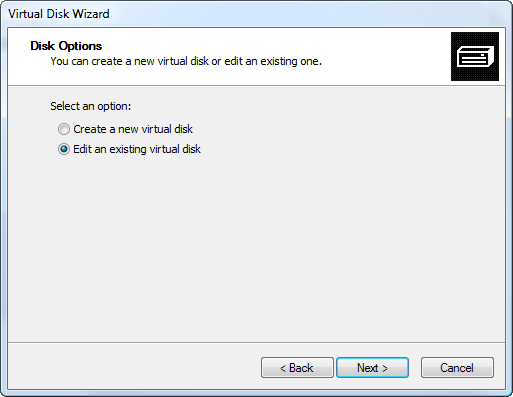
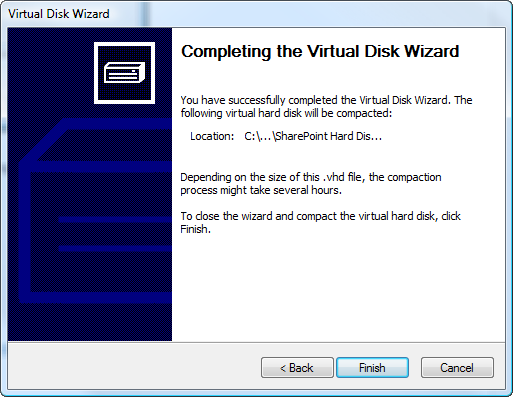
7. From the Virtual PC Console, File Menu, choose Virtual Disk Wizard. Select ‘Edit an existing Virtual disk’
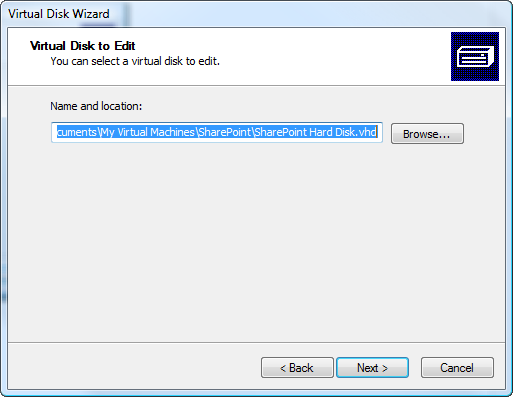
8. Find the existing image you want to compress
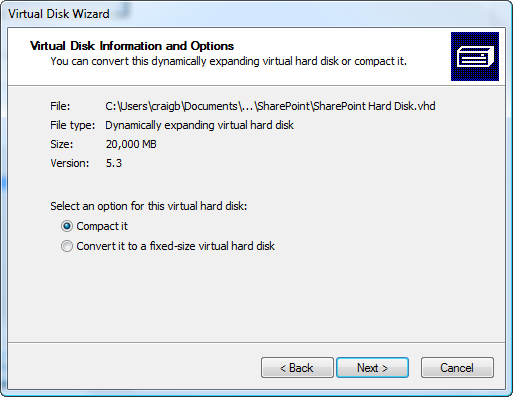
9. Choose Compact it
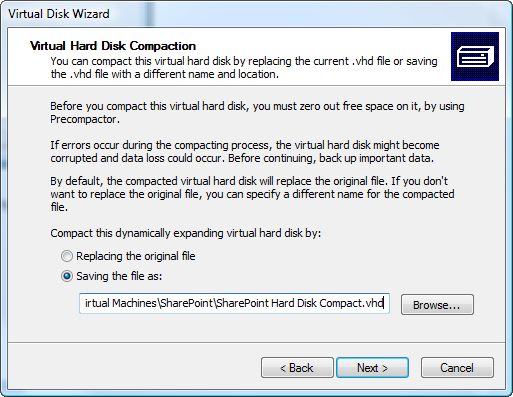
10. Choose to save a new copy (if possible) rather than replacing the existing copy. This is just safer in case something goes wrong (you could get your image corrupted).
I usually do this, then go and delete the original once the new one (compacted) is complete.
But since we are probably doing this because we need the extra space, chances are you won’t have room to save a new file. I’ll let you decided how to best cater for this…
11. You are ready to go! Click Finish and the process will go through and compact the image. It can take a while, so don’t do this during a busy coding session.
12. All going well you should have a significantly reduce image when complete. Most of mine reduce by 20-30% if I haven’t compacted them for a while. On a 20GB image that can be 5GB or more!
13. Finally, you now need to find more stuff to download and fill up all the extra room you’ve got :-)
Thanks!
Thanks a lot for the clear description.
Excellent article.
All steps are very much clear.
Thanks